If you’re looking to add a website cost calculator to your blog or website, you may be overwhelmed by the sheer number of choices that are available to you. WordPress has been the blogging the platform of choice for webmasters for years, but many aren’t sure how to integrate a stylish cost calculator into their website.
A Website Cost Calculator plugin for WordPress typically cost between $40-60 a year. They are a few options out there that don’t charge yearly fees, but we have found they don’t fix their bugs, add features or support their users as quickly. If you’re looking to make money off this idea of a cost calculator on your site, we highly recommend paying the yearly fee for a better plugin. $40 a year should be the profit of one sale. Imagine many sales 🙂
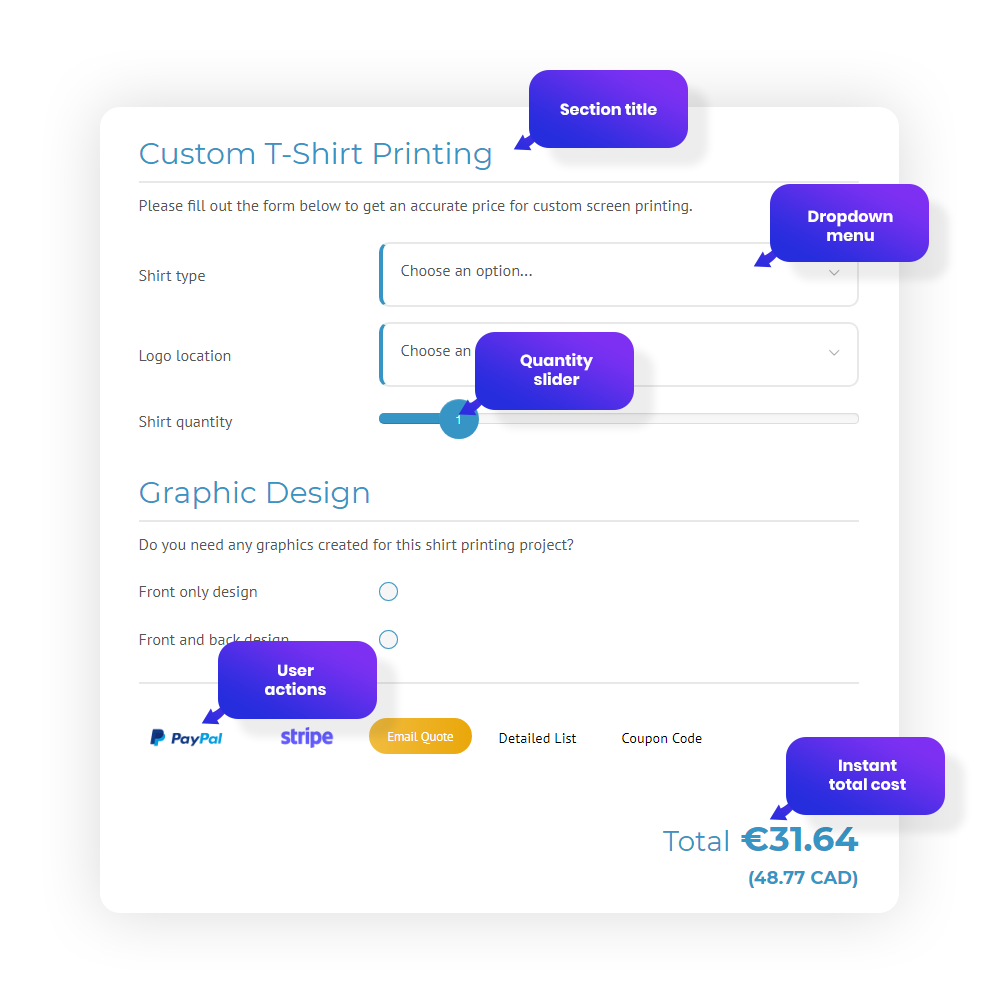
A WordPress Calculator plugin allows a web designer or business owner to create an interactive price list, quote form or estimation form on their website.
Here are some benefits
Here are some features
If you use WordPress, then it will be relatively easy to put together a stylish cost calculator that is built right into the platform. The very first thing you need to do is install the WordPress cost calculator plugin. Make sure that you have read and understood the instructions provided on the plugin’s page before you proceed.
Next, if you’re familiar with WordPress, you can integrate a wonderful plugin called WordPress Plugins. This plugin is all-inclusive and will enable you to make the most of your website cost calculator in ways that you never thought possible.
Simply search for “ WordPress Cost Calculator ” on the WordPress website. Once you’ve done this, select the plugin’s listing. Once you’ve installed the plugin, simply activate it, go to “Cost Calculator”, and it will immediately begin calculating the cost of any one of its own or your visitors’ past orders.
If you would like to set up a trial for the Website Cost Calculator plugin, simply follow the instructions on the plugin’s home page. You can also decide if you want to enable the plugin in your blog’s settings as well. We’ve found that enabling the plugin in your blog’s settings works great.
The Website Cost Calculator plugin is really very simple to set up and it only takes two simple steps. By clicking the “Add” button at the bottom of the WordPress Cost Calculator post, you will be able to install the plugin without having to create a new account.
You’ll be given the option to choose between hosting the plugin on your site and installing it to your site’s database directly through your site owner’s control panel. Choosing the latter option allows you to manage your plugin through your WordPress dashboard.
When you install the plugin, you’ll be prompted to save the information it needs to your site’s database. You can then use that information in order to calculate the cost of your past orders. Just click “Save” and it will load the plugin into the “Plugins” section of your site’s dashboard.
WordPress will also provide you with the option to tell the plugin what price range you would like to operate within. If you haven’t already, you can also click the “Manage Settings” link at the bottom of the WordPress plugin’s page. Once you’ve chosen this option, it will take you to a page where you can input the prices you wish to use with the Website Cost Calculator.
A few other settings can be configured, too. For example, you can tell WordPress to show the currency symbol at the end of the conversion to better allow users to understand what they’re doing. You can also have WordPress display how much each item costs in any other language that your readers may be accustomed to.
If you decide to use the widget-less site layout, you can now use a lot more characters to allow you to make more complex calculations. If you’d rather use the traditional plugin layout, however, you can configure the plugin to do that as well.
If you aren’t very familiar with WordPress itself, it should still be fairly straightforward to figure out how to put together a WordPress cost calculator. After you’ve installed the plugin, you can save the settings you’ve chosen for the plugin, and then you can even choose which language the plugin will display in.